How to Take a Screenshot on a Mac
Need to take a screenshot on your Mac? Are you used to Windows? Windows OS has a simple print screen key on the keyboard which makes it easy to take screenshots. You won't find a print-screen on Mac keyboards however. This might be confusing at first, because how are you supposed to take screenshots on Macbook without a screenshot key?
Have no fear — the process of how to take a screenshot on Mac is very simple and straightforward. Even better news—you have more than one way to do it.
How to Take a Screenshot on Mac With the Keyboard
The simplest and fastest way to get different types of screenshots is by using some easy-to-remember Mac keyboard shortcuts. Using keyboard shortcuts is by far the most efficient way to take a screenshot on a Mac.
The best part is it only takes three keys, and you have a variety of options from taking a screenshot of the whole page, a particular page or even just a section.
Take a Screenshot of Your Entire Mac Screen
To take a screenshot of your entire visible screen, press the following buttons together: Command + Shift + 3. A file will be saved to your Desktop with the file name in the format, Screen Shot [DATE + TIME].

You can double-click on the screenshot icon on your Desktop to open it immediately with Preview. If you need to open the screenshot with a different app (like Photoshop), just right-click on it and choose "Open With…"
Note: if you're a power user and have multiple screens on your desktop, this feature will create separate files for each of the running screens. This might not be ideal if you only need a screenshot of a specific page. Don't worry, we'll show you how to take a screenshot of only one page further in this guide.
How to Take a Screenshot of A Selection of Your Mac Screen
If you don't need or don't want your full screen captured, you can choose to select only a portion of your screen by pressing the following buttons together: Command + Shift + 4.
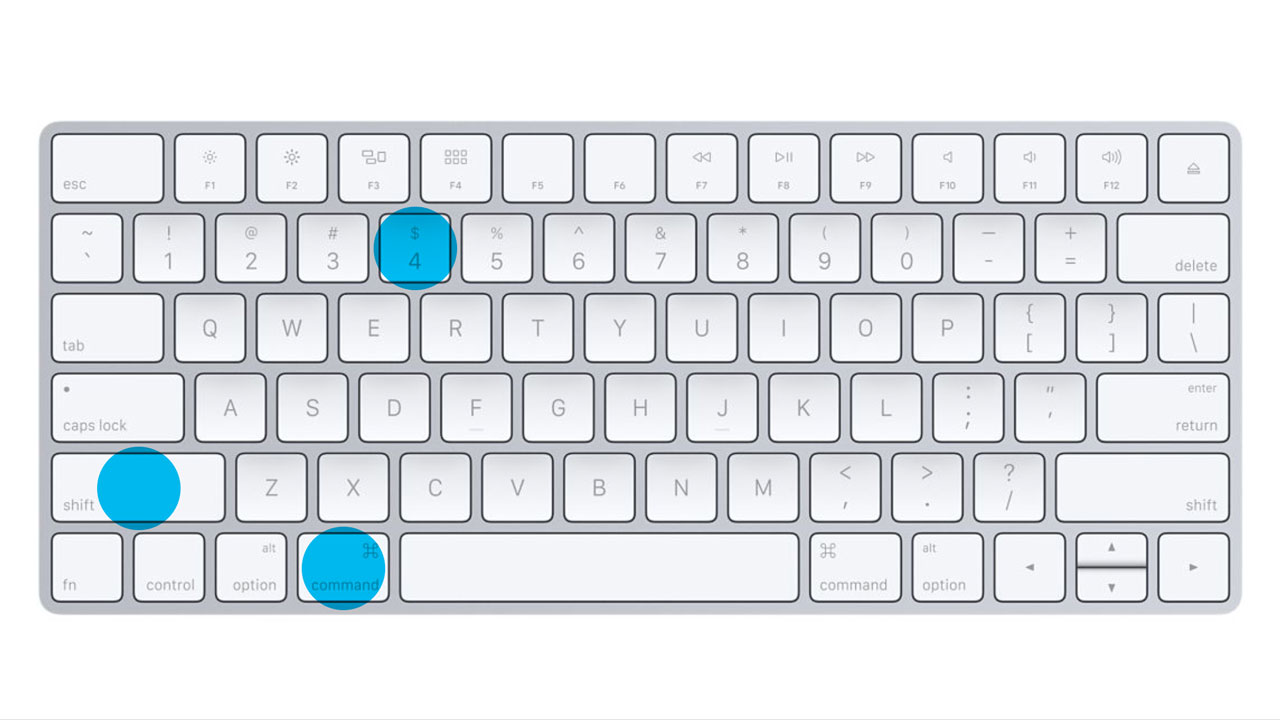
You'll see a crosshair cursor appear on your screen. Choose one corner of the area you want to capture and then click and hold. Drag the cursor to the opposite corner of the region you want to capture and release.
The resulting area will be saved as a file on your desktop. Just as before, the file will be saved in the format, Screen Shot [DATE + TIME] and you can open it in Preview by double-clicking on the icon.
Take a Screenshot of One Window/App on Your Mac
Do you want to capture a screenshot of the contents of just a single window or app on your Mac? Don't want to mess around with trying to get the Selection just right? Or sit with a screenshot of every single page you have open? Don't worry, there's a great shortcut to do this.
Just as before, press Command + Shift + 4 to start a selection. But then press your spacebar. Your cursor will change from a crosshair to a camera.
Place the camera over the window or app you want to capture. The active window will become shaded with blue.
Then click the mouse and your active window will be saved to your Desktop as a screenshot.
Just as before, you can open the image with Preview by double-clicking on it.
Save a Screenshot to the Clipboard Instead of a File
Don't want to clutter up your Desktop with screenshot files? Mac students can take shots by copying them to the clipboard so that you can paste them into another application immediately, there's a great shortcut to help you achieve this.
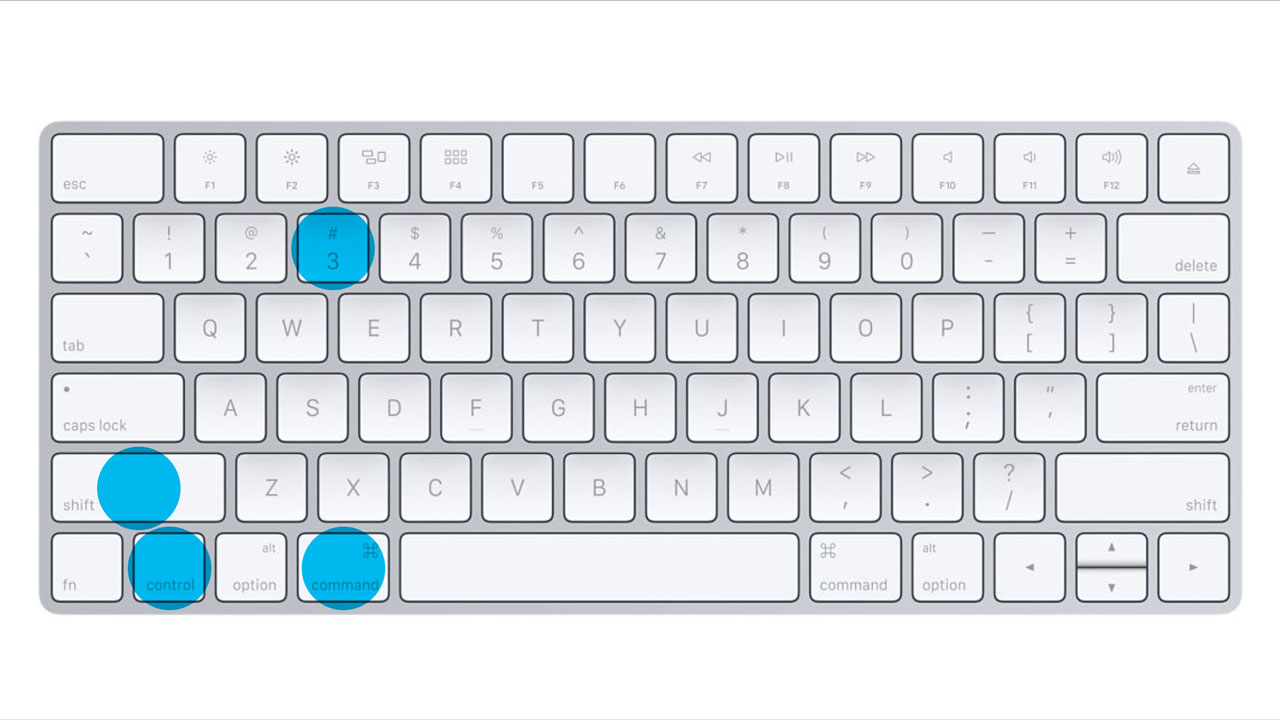
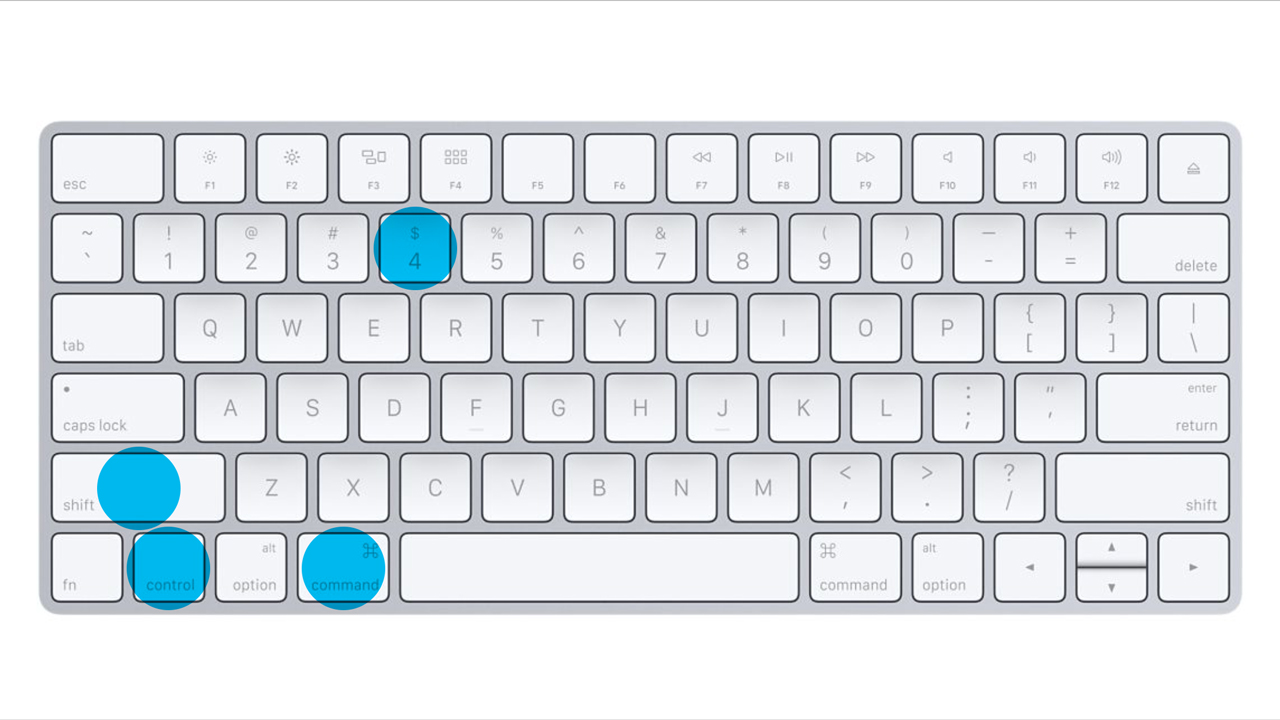
Simply use the steps above for either taking a screenshot of the entire screen or a selection of the screen. But this time, include the Control Key in the series of keys you press, like this:
Control + Command + Shift + 3
Control + Command + Shift + 4
When you add the Control key, the image is copied to your Clipboard instead of being saved to a file. Remember, you can only store one screenshot at a time in your clipboard. If you need to use multiple screenshots it's best to let them go to your desktop while you're working with them and move them once you're done.
However, if you're feeling adventurous, remember that you can install a Mac Clipboard Utility to extend your clipboard and store multiple items at once. This works for screenshots, too!
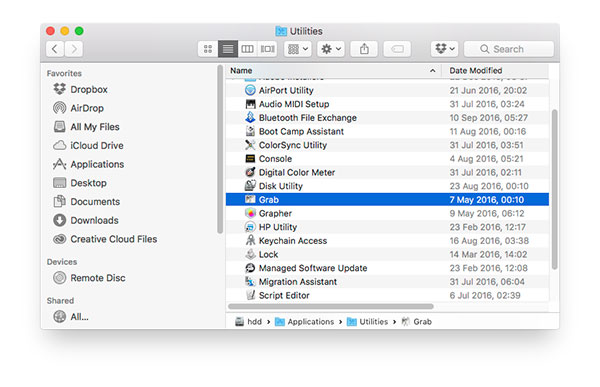
How to Take a Screenshot on a Mac with Grab
Perhaps keyboard shortcuts aren't your thing? Do you prefer taking screenshots with the help of an App? Don't worry — most Mac computers come with a dedicated screenshot app that everyone can use. It's called Grab and you'll find it safely tucked away in your Applications/Utilities folder.
Grab supports four different capture modes:
- Selection
- Window
- Screen
- Timed Screen
The first three modes work exactly the same as the keyboard shortcut methods outlined above. However, when you take the screenshot, it appears inside the Grab application, where you can save it anywhere you like. This method beats cluttering up your desktop with lots of "Screen Shot" files.
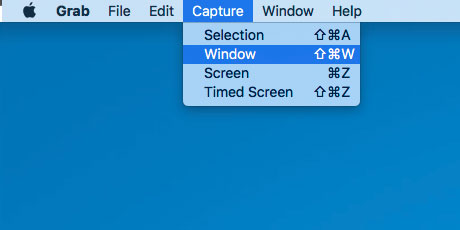
The fourth mode, Timed Screen, is special. It works just like the time delay function on your camera. It will take a screenshot of your entire screen 10 seconds after you start it. It's ideal for capturing a screenshot that requires you to perform one or more actions beforehand. It might take a little practice to get the timing right, but in special situations, it can save you a lot of hassle.
Use a Dedicated Mac Screenshot App
Looking for something more powerful? There are several dedicated screenshot applications available for the Mac. Many of them have enhanced features that simply can't be done with the keyboard shortcuts or with Grab. These features include things like adding annotations to the screenshot, such as text, arrows and shapes, or applying effects.
While you can also use an app like Jing to take simple screenshots, there are a few others that we prefer. Here's a quick list of some of the very best screenshot apps for the Mac.
Paparazzi
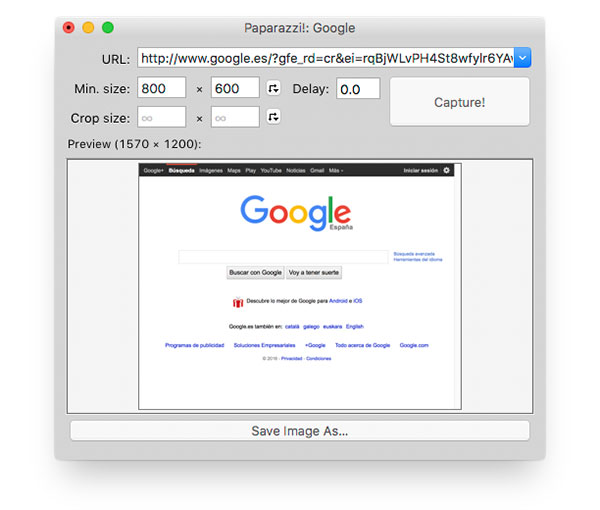
Paparazzi is a specialized tool for capturing screenshots from Web pages, and not direct shots from your screen. Simply provide the URL you want to capture and Paparazzi does the rest. It's ideal for capturing a full web page when it won't fit completely on your screen in one shot.
You can specify a minimum image size for the capture and even specify a time delay if you need one. This is perfect for Web pages that change their appearance after they initially load.
Skitch (the Original)
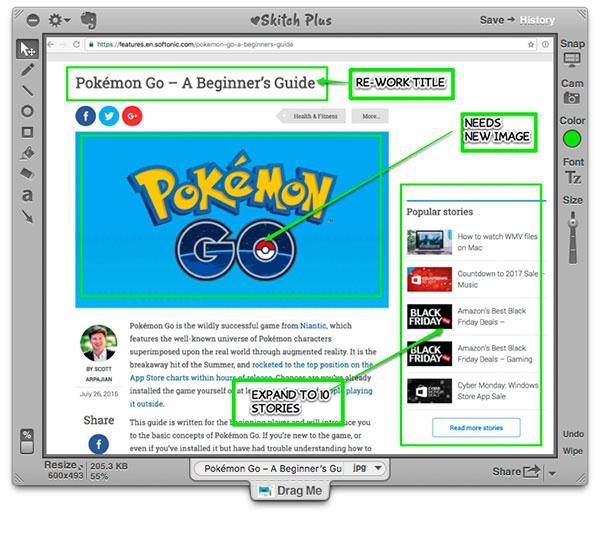
This is a bold claim, but Skitch is the best screenshot app ever made for the Mac. It was incredibly easy to use, allowed fast annotation of screenshots with intuitive controls, and preserved a complete history of everything you ever took a screenshot of without cluttering up your desktop or folder system.
Skitch was originally developed by Plasq, but later sold to Evernote, who proceeded to make a lot of changes to the app that proved deeply unpopular with hardcore users. And by that I mean me. And this is coming from someone who loves the Evernote app.
Although you can download and install the latest version of Skitch on your Mac (and enjoy tight integration with Evernote), I recommend you try version 1.0.12.
If you're feeling adventurous, you can still find copies of older versions of Skitch floating around. Although version 1.0.12 of Skitch is officially unsupported, it still works for most users. There's no guarantee it will work on all machines or in future upgrades of the OS. If you're willing to work with unsupported software, I strongly recommend Skitch for all your screenshot needs.
Napkin
Napkin is an advanced screenshot tool that excels at annotations. If you find yourself sharing a lot of screenshots and wanting to add annotations like text, arrows, or highlights, take a look at this tool.
It's perfect for sending visual feedback to friends and colleagues and truly demonstrates that a picture is worth a thousand words.
Unfortunately, there's no trial version. Napkin is only available for purchase via the Mac App Store. But you can take a peek at its features on the developer's Web site.
There you have it: everything you need to put together screenshots quickly and easily on your Mac. Have some screenshot tips of your own to share? Don't be shy–help out your fellow Mac users by posting in the comments section below.
How to Take a Screenshot on a Mac
Source: https://en.softonic.com/articles/how-to-take-a-screenshot-on-a-mac